Quick Start
What You Need
Before you start, gather the following:
- WD DRIVE driver: a 42 mm stepper servo (stp42) or a tubular linear motor (lin).
- USB-CAN adapter: to connect the PC to the CAN bus.
- DC power supply: 48 V DC.
- Cables: a USB Type-C data cable (adapter to PC) and CAN signal wires.
- PC: with the wddrive-studio host software installed.
If this is the first power-up, fix the motor and mechanism on a bench first so that homing or back-and-forth motion cannot cause a collision.
Wiring
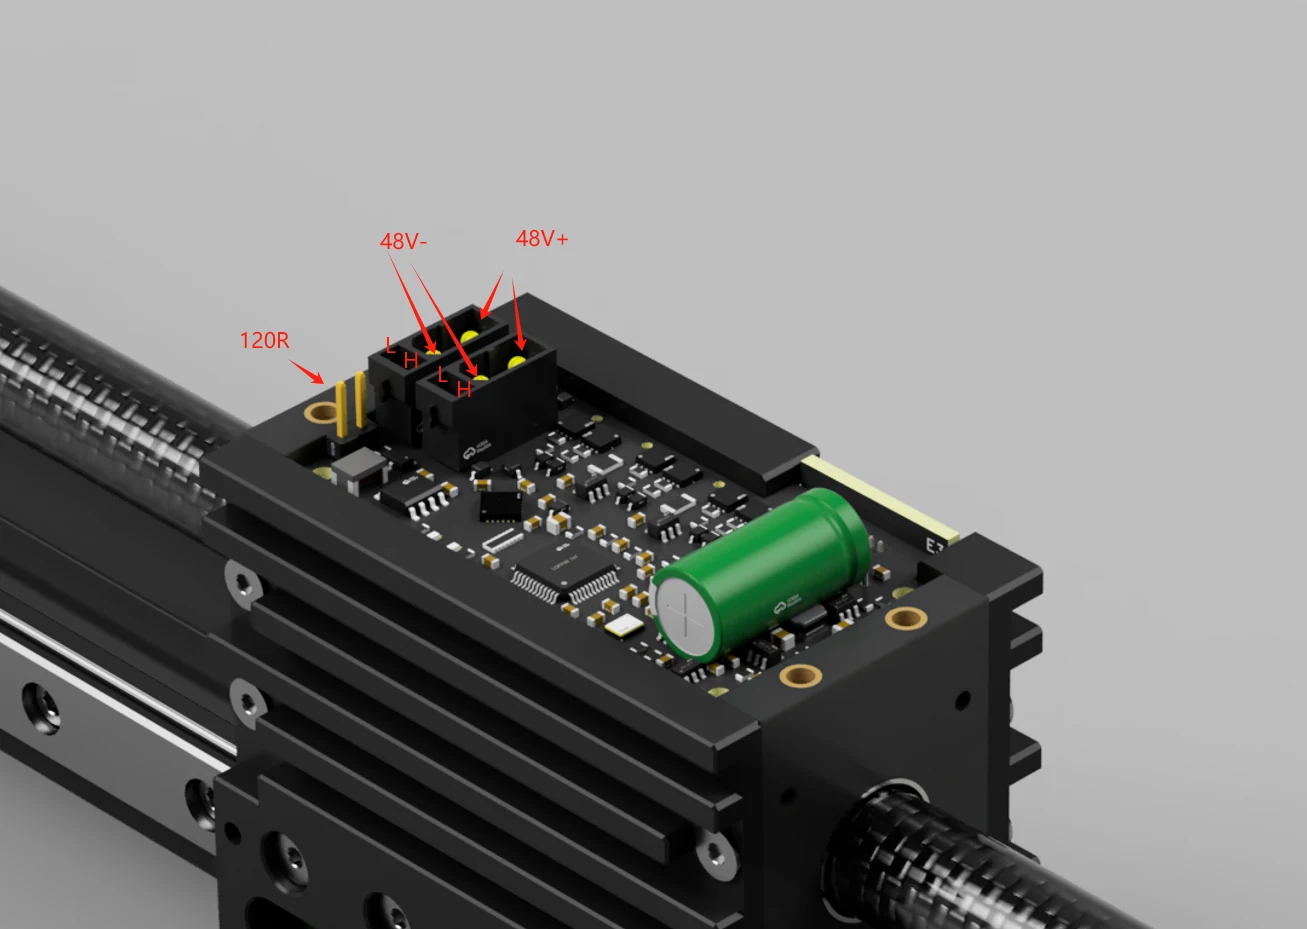
- Connect the 48 V DC supply to the driver’s VIN / GND, taking care with polarity.
- Wire the CAN bus: connect CAN_H to CAN_H and CAN_L to CAN_L between the adapter and the driver — do not cross them.
- Fit a 120 Ω termination resistor at each end of the bus: one end can be enabled with the switch on the side of the USB-CAN adapter, the other at the driver.
- Connect the USB-CAN adapter to the PC with the USB Type-C cable.
- Finish all wiring before powering the driver.
Reversed CAN_H / CAN_L, a missing termination resistor or an unpowered bus will all prevent the host software from finding any node. Do the wiring with the power off.
Install and Connect
- Download and install wddrive-studio from the downloads page.
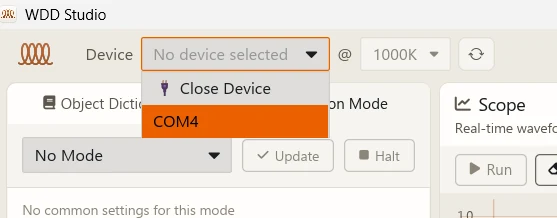
- Open the app and pick the WD DRIVE USB-CAN interface in the Device dropdown at the top. Selecting it connects automatically; after unplugging the adapter, click the refresh button next to it to re-enumerate.
- Once connected, the @ bitrate is read back automatically. The default is 1000K (= 1 Mbit/s), matching the driver’s factory default. If your device uses a different bitrate, select the same value.
- Choose the motor node in the Node dropdown. Online nodes carry a 💡 icon and are listed first. The factory default node is 1.
If the Device dropdown is empty, click refresh first; if it stays empty, check the USB cable, adapter power and driver. If the Node dropdown shows no online node, it is usually a bitrate mismatch, reversed CAN_H/L, missing 120 Ω termination, or the driver being unpowered.
Run the Built-in Example
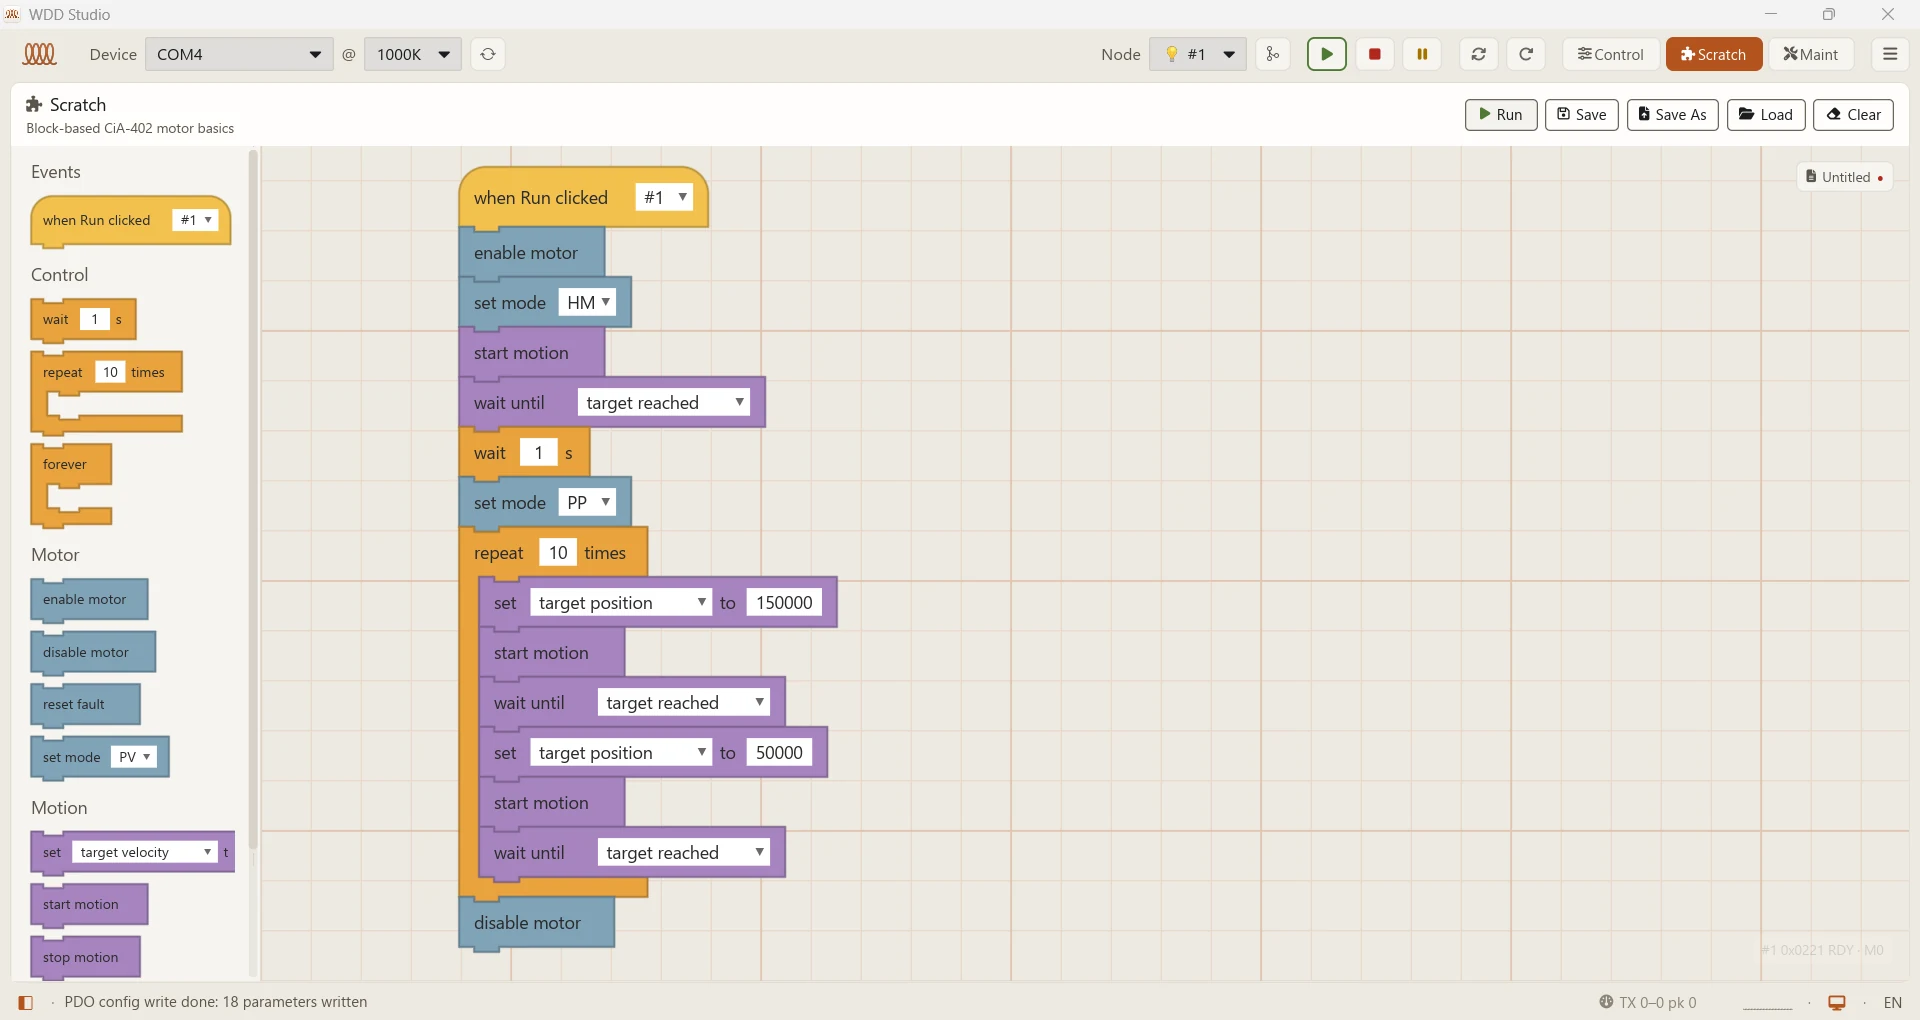
- Switch to the Blocks tab; the canvas already has the built-in example loaded.
- Check the node number on the “when run clicked” block (default 1; change it to your actual node).
- Click Run (the green flag) at the top to start.
The built-in example runs: enable motor (EN) → homing (HM, mode 6) → wait until target reached → wait 1 second → switch to PP profile position (mode 1) → move 10 times between 150000 and 50000 → disable motor. You can press Stop at any time.
The 150000 / 50000 positions are travel distances in the default user units. If they exceed the software limits (
0x607D), the driver rejects the set-point (status word bit11 is set); adjust them to your mechanism’s travel.
What a Healthy Run Looks Like
A healthy run should satisfy all of these:
- The motor follows the example: homing first, then smooth motion between the two positions.
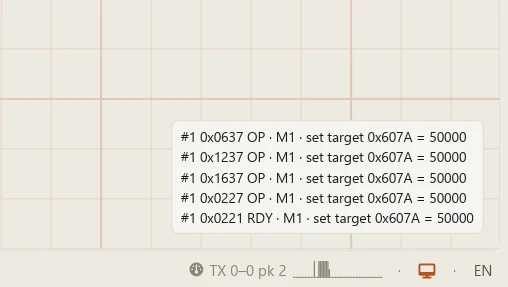
- The monitor bar at the bottom-right of the canvas looks like
#1 0x·· short-status · M1. - The status word reaches Operation enabled, the target-reached bit (bit10) toggles periodically, and there is no Fault.
- No unusual noise or obvious vibration while running.
Troubleshooting
| Symptom | Likely cause | What to do |
|---|---|---|
| Device dropdown is empty | Adapter not enumerated | Click refresh; check the USB cable, adapter power and driver. |
| No online node in the Node dropdown | Bus communication problem | Confirm matching bitrate, CAN_H/L not reversed, 120 Ω at both ends, driver powered, correct node ID. |
| Motor does not move after Run | Not enabled / wrong node / fault | Check the block’s node number; verify enabled state and absence of a Fault; make sure the target is within the software limits (bit11). |
| Motor keeps getting warm while enabled | Normal holding torque | Holding torque at standstill is normal; if it stalls or draws abnormal current, cut power and check the mechanics and parameters. |
Next Steps
- Learn enabling, operating modes and fault handling in depth: CiA402
- Use WD DRIVE motors under Klipper: Klipper
- Full host-software guide: wddrive-studio